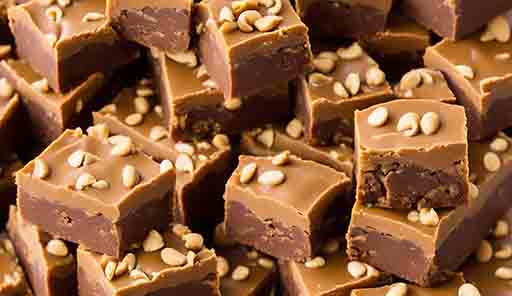
Fantasy Fudge , that glorious square of sweetness, already holds a certain magic. But why not amp it up and create a fantastical fudge worthy of any mystical realm? Today, we’re conjuring up a recipe that will satisfy your sweet tooth and transport your taste buds to another dimension.
Table of Contents
Fantasy Fudge Recipe

Fantasy Fudge Recipe Ingredients:
- 1 cup (2 sticks) unsalted butter
- 2 cups granulated sugar
- 1/2 cup packed light brown sugar
- 1/2 teaspoon salt
- 1/4 teaspoon cream of tartar
- 1 (12-ounce) can evaporated milk
- 1 teaspoon vanilla extract
- 1 teaspoon food coloring (optional, choose your magical hue!)
- Garnishes (pick your adventure):
- Chopped nuts (almonds, pecans, walnuts)
- Sprinkles (rainbow, edible glitter, star-shaped)
- Mini marshmallows
- Crushed cookies (Oreos, Biscoff, gingerbread)
- Candied fruits (cherries, oranges, dragonfruit)
Fantasy Fudge Recipe Instructions:
- Cast a sweet spell: Melt the butter in a large saucepan over medium heat.
- Summon the sugars: Add the granulated and brown sugars, salt, and cream of tartar. Whisk until dissolved and slightly warmed.
- Bring forth the magical liquid: Carefully pour in the evaporated milk and stir to combine.
- Let it simmer and bubble: Increase heat to medium-high and bring to a rolling boil. Don’t stir, just let it bubble furiously for 5-7 minutes, until the mixture reaches 234°F (use a candy thermometer for precision).
- Time to cool down: Remove from heat, stir in vanilla and food coloring (if using). Let it cool slightly, about 5 minutes, before stirring again.
- Enchantment complete: Pour the fudge into a greased 9×13 inch pan.
- Garnish with wonder: While the fudge cools, choose your toppings and sprinkle them on top, creating your own edible masterpiece.
- Patience, young padawan: Let the fudge cool completely in the pan, at least 4 hours, preferably overnight.
- Slice and conquer: Cut the fudge into squares and prepare to be transported to a realm of pure delight!
Tips and Tricks:
- For a truly otherworldly twist, add a teaspoon of espresso powder or flavored extract (mint, orange, almond) to the cooled fudge before pouring.
- Don’t have a candy thermometer? No worries! Just drop a teaspoon of the hot fudge into a cup of cold water. If it creates a soft ball, consider it ready.
- Want to share your fantastical creation? Wrap the fudge squares in colorful, patterned paper and tie them with ribbons for a whimsical touch.
So, grab your cauldron (aka saucepan), put on your wizarding apron, and get ready to create a fudge so good, it could be stolen straight from a fairy tale! Remember, the key ingredient is creativity, so embrace your inner alchemist and conjure up a fudge that’s uniquely yours. Happy (and delicious) fantasizing!
Fantasy Fudge Peanut Butter

Ah, a wise choice! Peanut butter adds a whole new dimension of rich, nutty goodness to the already fantastical realm of fudge. Let’s whip up a Peanut Butter Fantasy Fudge fit for any adventurer’s taste buds!
Fantasy Fudge Peanut Butter Ingredients:
- 1 cup (2 sticks) unsalted butter
- 2 cups granulated sugar
- 1/2 cup packed light brown sugar
- 1/2 teaspoon salt
- 1/4 teaspoon cream of tartar
- 1 (12-ounce) can evaporated milk
- 1 teaspoon vanilla extract
- 1 teaspoon food coloring (optional, choose your magical hue!)
- 1 cup creamy peanut butter
Garnishes (pick your adventure):
- Chopped peanuts or peanut brittle
- Chocolate chips (milk, dark, white, peanut butter!)
- Pretzels (crushed or whole)
- Reese’s Pieces
- Caramel bits
- Toasted coconut flakes
Instructions:
- Follow steps 1-4 from the original Fantasy Fudge recipe, mixing butter, sugars, salt, cream of tartar, and evaporated milk. Bubble it up to that magical 234°F!
- Peanut butter power: Remove from heat and stir in vanilla, food coloring (if using), and the glorious peanut butter. Stir until fully incorporated and beautifully creamy.
- Enchantment complete: Pour the fudge into your greased pan and prepare for garnishing fun!
- Peanut butter paradise: While the fudge cools, choose your toppings and let your whimsy loose. Sprinkle, scatter, and arrange those delights on top, creating a peanut butter haven.
- Patience, young padawan: Let the fudge cool completely in the pan, at least 4 hours, preferably overnight. Be strong, resist the siren song of its peanut buttery aroma!
- Slice and conquer: Cut the fudge into squares and prepare to embark on a taste bud adventure. Each bite will be a creamy, nutty explosion of magic!
Tips and Tricks:
- For an extra peanut punch, use chunky peanut butter and swirl some throughout the fudge before topping.
- Feeling fancy? Drizzle melted chocolate over the cooled fudge squares for a contrasting flavor and visual appeal.
- Want to go truly peanut butter bonkers? Make a peanut butter swirl by reserving a tablespoon of peanut butter while mixing the rest into the fudge. Once poured, dollop the reserved peanut butter on top and swirl it in with a knife for a mesmerizing pattern.
This Peanut Butter Fantasy Fudge is sure to send your taste buds on a magical journey. So grab your spoon, channel your inner adventurer, and embrace the peanut buttery goodness!
Why is my fantasy fudge dry?
the dreaded dry fudge! Even in the realm of fantasy, it can be a real beast to tame. Let’s uncover the culprits behind your fudge’s dryness and conjure up some solutions to fix it:
Possible reasons for dry fudge:
- Overcooking: This is the most common culprit. The longer you boil the sugar mixture, the more moisture evaporates, leading to a crumbly fudge. Aim for the magic temperature of 234°F and promptly remove from heat to avoid overcooking.
- Not enough moisture: Did you accidentally add less evaporated milk than the recipe requires? Even a slight difference can affect the texture. If you suspect this, you can try warming the fudge gently and adding a small amount of milk (a tablespoon at a time) to see if it improves the consistency.
- Sugar crystallization: If sugar crystals form while cooking, they can disrupt the smooth texture and lead to dryness. Make sure to whisk the sugar mixture before it reaches boiling point to prevent this.
- Inadequate beating: After removing from heat, don’t just let your fudge sit! Beat it gently for 5-7 minutes. This helps incorporate air and creates a smooth, creamy texture.
- Humidity: Believe it or not, even the air can play a role! High humidity can make fudge dry and grainy. If you live in a humid climate, consider adding a teaspoon of corn syrup to the recipe, which helps prevent crystallization and preserves moisture.
Fixing your dry fudge:
- Unfortunately, there’s no universal cure-all for dry fudge. However, depending on the severity, you can try some tricks:
- Reheat and add moisture: If the fudge is slightly dry, gently reheat it over low heat, stirring constantly. Add a tablespoon of milk at a time until it reaches a fudgier consistency. Be careful not to overcook it further.
- Repurpose it: If the fudge is too dry to enjoy as squares, don’t despair! Mash it up and turn it into truffles, brownie bites, or even fudge ice cream topping.
Preventing future dryness:
- Follow the recipe carefully: Measure ingredients precisely and stick to the cooking times.
- Candy thermometer is your friend: Invest in a candy thermometer to ensure you reach the exact temperature and avoid overcooking.
- Whisk with wisdom: Don’t underestimate the power of whisking! It prevents sugar crystallization and promotes smooth texture.
- Beat for creamy dreams: Remember that post-heat beating. It’s crucial for a luscious fudge.
How long does fantasy fudge last?
Fantasy fudge, just like any other fudge, has a shelf life, but the good news is you can enjoy its magical deliciousness for a while! Here’s the scoop on how long your fudge will stay delightful:
At room temperature:
- In an airtight container, fantasy fudge can hold its own for 1-2 weeks. The cooler the room temperature, the longer it will last.
- Be aware that dry air can make the fudge dry out faster, so keep it away from vents and windows.
In the refrigerator:
- For extended enjoyment, store your fudge in the refrigerator. This can stretch its shelf life to 3-4 weeks.
- Wrap the fudge squares individually in plastic wrap or parchment paper before placing them in an airtight container to prevent them from sticking together or absorbing fridge odors.
- Let the fudge come to room temperature for about 30 minutes before digging in, as it will be firmer when cold.
In the freezer:
- Want to keep your fudge fantasy alive even longer? Freeze it! Wrapped individually and stored in an airtight container, it can last up to 4 months.
- Thaw the fudge overnight in the refrigerator before indulging.
Signs your fudge needs a farewell:
- Any mold or discoloration is a clear sign your fudge has seen its best days.
- If it develops a strong off-smell, it’s time to say goodbye.
- Dryness and crumbliness can also indicate that the fudge is past its prime, though you can still repurpose it into other treats.
Fantasy Fudge Jet Puffed
Fantasy Fudge Jet Puffed refers to a specific type of fudge recipe that combines classic fudge ingredients with the fluffy richness of Jet Puffed Marshmallow Creme. It’s like a delicious hybrid between creamy fudge and a dreamy marshmallow delight!
Ingredients:
- Classic Fudge Base: It incorporates ingredients like butter, sugars, evaporated milk, and vanilla extract, creating the familiar fudge base we all know and love.
- Jet Puffed Magic: The addition of a whole jar of Jet Puffed Marshmallow Creme adds a distinct dimension of light, fluffy texture and intense marshmallow flavor to the fudge.
- Endless Possibilities: The recipe is versatile and allows for plenty of creativity. You can customize it with various garnishes like nuts, sprinkles, pretzels, or even swirl in other flavors like chocolate or peanut butter.
Characteristics:
- Texture: Jet Puffed Fantasy Fudge is typically softer and airier than traditional fudge, thanks to the marshmallow creme. It offers a melt-in-your-mouth experience with delightful pockets of fluffy goodness.
- Flavor: The combination of creamy fudge and sweet marshmallow creates a unique and irresistible flavor profile. It’s perfect for those who love both fudgy richness and marshmallowy sweetness.
- Popularity: This recipe has gained widespread popularity due to its ease of preparation, delicious taste, and playful twist on the classic fudge concept. You can find various versions of it online and even in cookbooks.
Fantasy Fudge Recipe Jet Puff
Oh, combining the fluffy magic of Jet Puffed with the fantastical realm of fudge? Now you’re speaking my language! Let’s conjure up a Jet Puffed Fantasy Fudge that’s light, creamy, and bursting with marshmallowy dreams.
Ingredients:
- 1 cup (2 sticks) unsalted butter
- 2 cups granulated sugar
- 1/2 cup packed light brown sugar
- 1/2 teaspoon salt
- 1/4 teaspoon cream of tartar
- 1 (12-ounce) can evaporated milk
- 1 teaspoon vanilla extract
- 1 teaspoon food coloring (optional, choose your magical hue!)
- 1 (7-ounce) jar Jet Puffed Marshmallow Creme
Garnishes (pick your adventure):
- Toasted coconut flakes
- Mini marshmallows
- Chopped nuts (pecans, walnuts, pistachios)
- Crushed pretzels
- Rainbow sprinkles
- Edible glitter (for extra sparkle!)
Instructions:
- Cast a sweet spell: Melt the butter in a large saucepan over medium heat.
- Summon the sugars: Add the granulated and brown sugars, salt, and cream of tartar. Whisk until dissolved and slightly warmed.
- Bring forth the magical liquid: Carefully pour in the evaporated milk and stir to combine.
- Let it simmer and bubble: Increase heat to medium-high and bring to a rolling boil. Don’t stir, just let it bubble furiously for 5-7 minutes, until the mixture reaches 234°F (candy thermometer, remember?).
- Time to cool down: Remove from heat, stir in vanilla and food coloring (if using). Let it cool slightly, about 5 minutes, before stirring again.
- Marshmallow magic: Gently fold in the Jet Puffed Marshmallow Creme until fully incorporated. Be careful not to overmix, you want to maintain those fluffy swirls.
- Enchantment complete: Pour the fudge into your greased pan and prepare for garnishing fun!
- Top with wonder: While the fudge cools, choose your toppings and sprinkle them on top, creating your own marshmallow masterpiece.
- Patience, young padawan: Let the fudge cool completely in the pan, at least 4 hours, preferably overnight. Resist the urge to dig in immediately!
- Slice and conquer: Cut the fudge into squares and prepare to be transported to a land of fluffy, marshmallowy delight!
Tips and Tricks:
- For a truly dreamy texture, don’t overcook the sugar mixture. Stop at the magic 234°F for optimal lightness.
- Want a bolder marshmallow flavor? Toast the Jet Puffed slightly before adding it to the fudge.
- Feeling adventurous? Swirl in some chocolate chips, peanut butter, or caramel sauce for a unique flavor twist.
- If the fudge seems too thick, you can add a tablespoon of warm milk at a time until it reaches your desired consistency.
This Jet Puffed Fantasy Fudge is a whimsical treat that’s sure to please even the most discerning of chocoholics. So grab your spatula, unleash your inner alchemist, and create a fudge fit for any fairytale feast! Remember, the possibilities are endless when it comes to fantasy and marshmallows. So dream big, experiment, and enjoy your sugary adventures!


